Hello everyone!
Since I got an overwhelming amount of requests about how I made my dual camera strap, I decided to make another one and take pictures as I did it (the second one I made turned out EVEN BETTER than the first one I made.) So I could write this post on how to make a DIY dual camera strap Harness.
So without further ado, here we go;
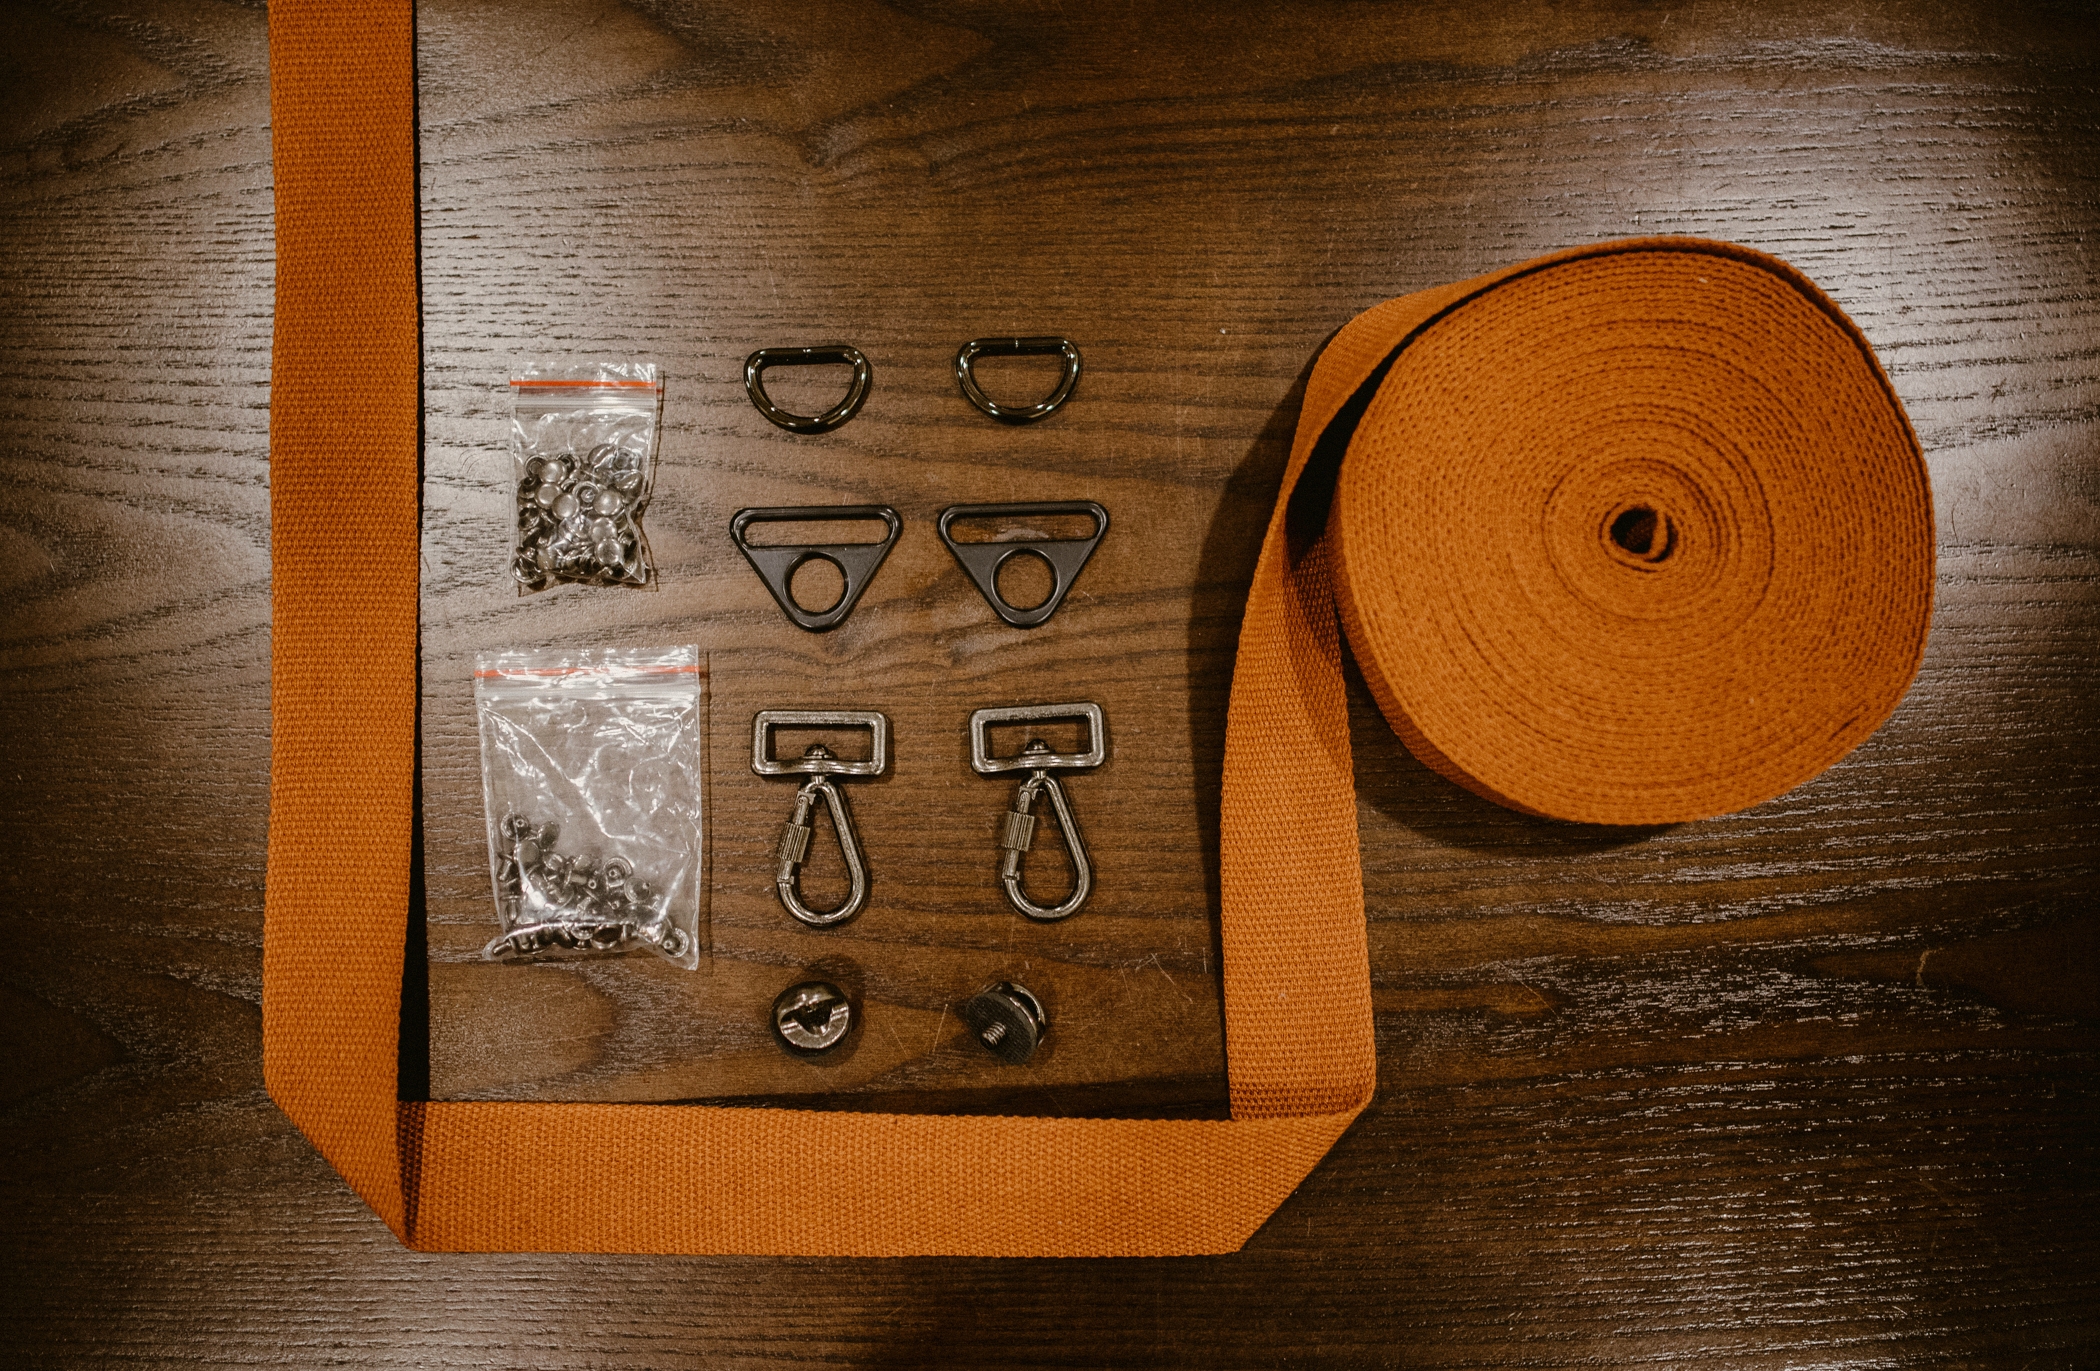
THINGS YOU WILL NEED
1. Camera Strap Carabiner
2. Metal Double Cap Rivet stud
3. 38mm Cotton Canvas Strap/Ribbon
4. 38mm triangle D Ring
5. Camera Strap Tripod Quick Release Plate Mount
6. D rings (optional)
(I bought all of these on Aliexpress using the exact or similar keywords, a lot of these you can also find on Amazon or Ebay)
THE STEPS
So since there are quite a few little steps, I'm going number them so its easier for people to keep track at what step they're at.
#1
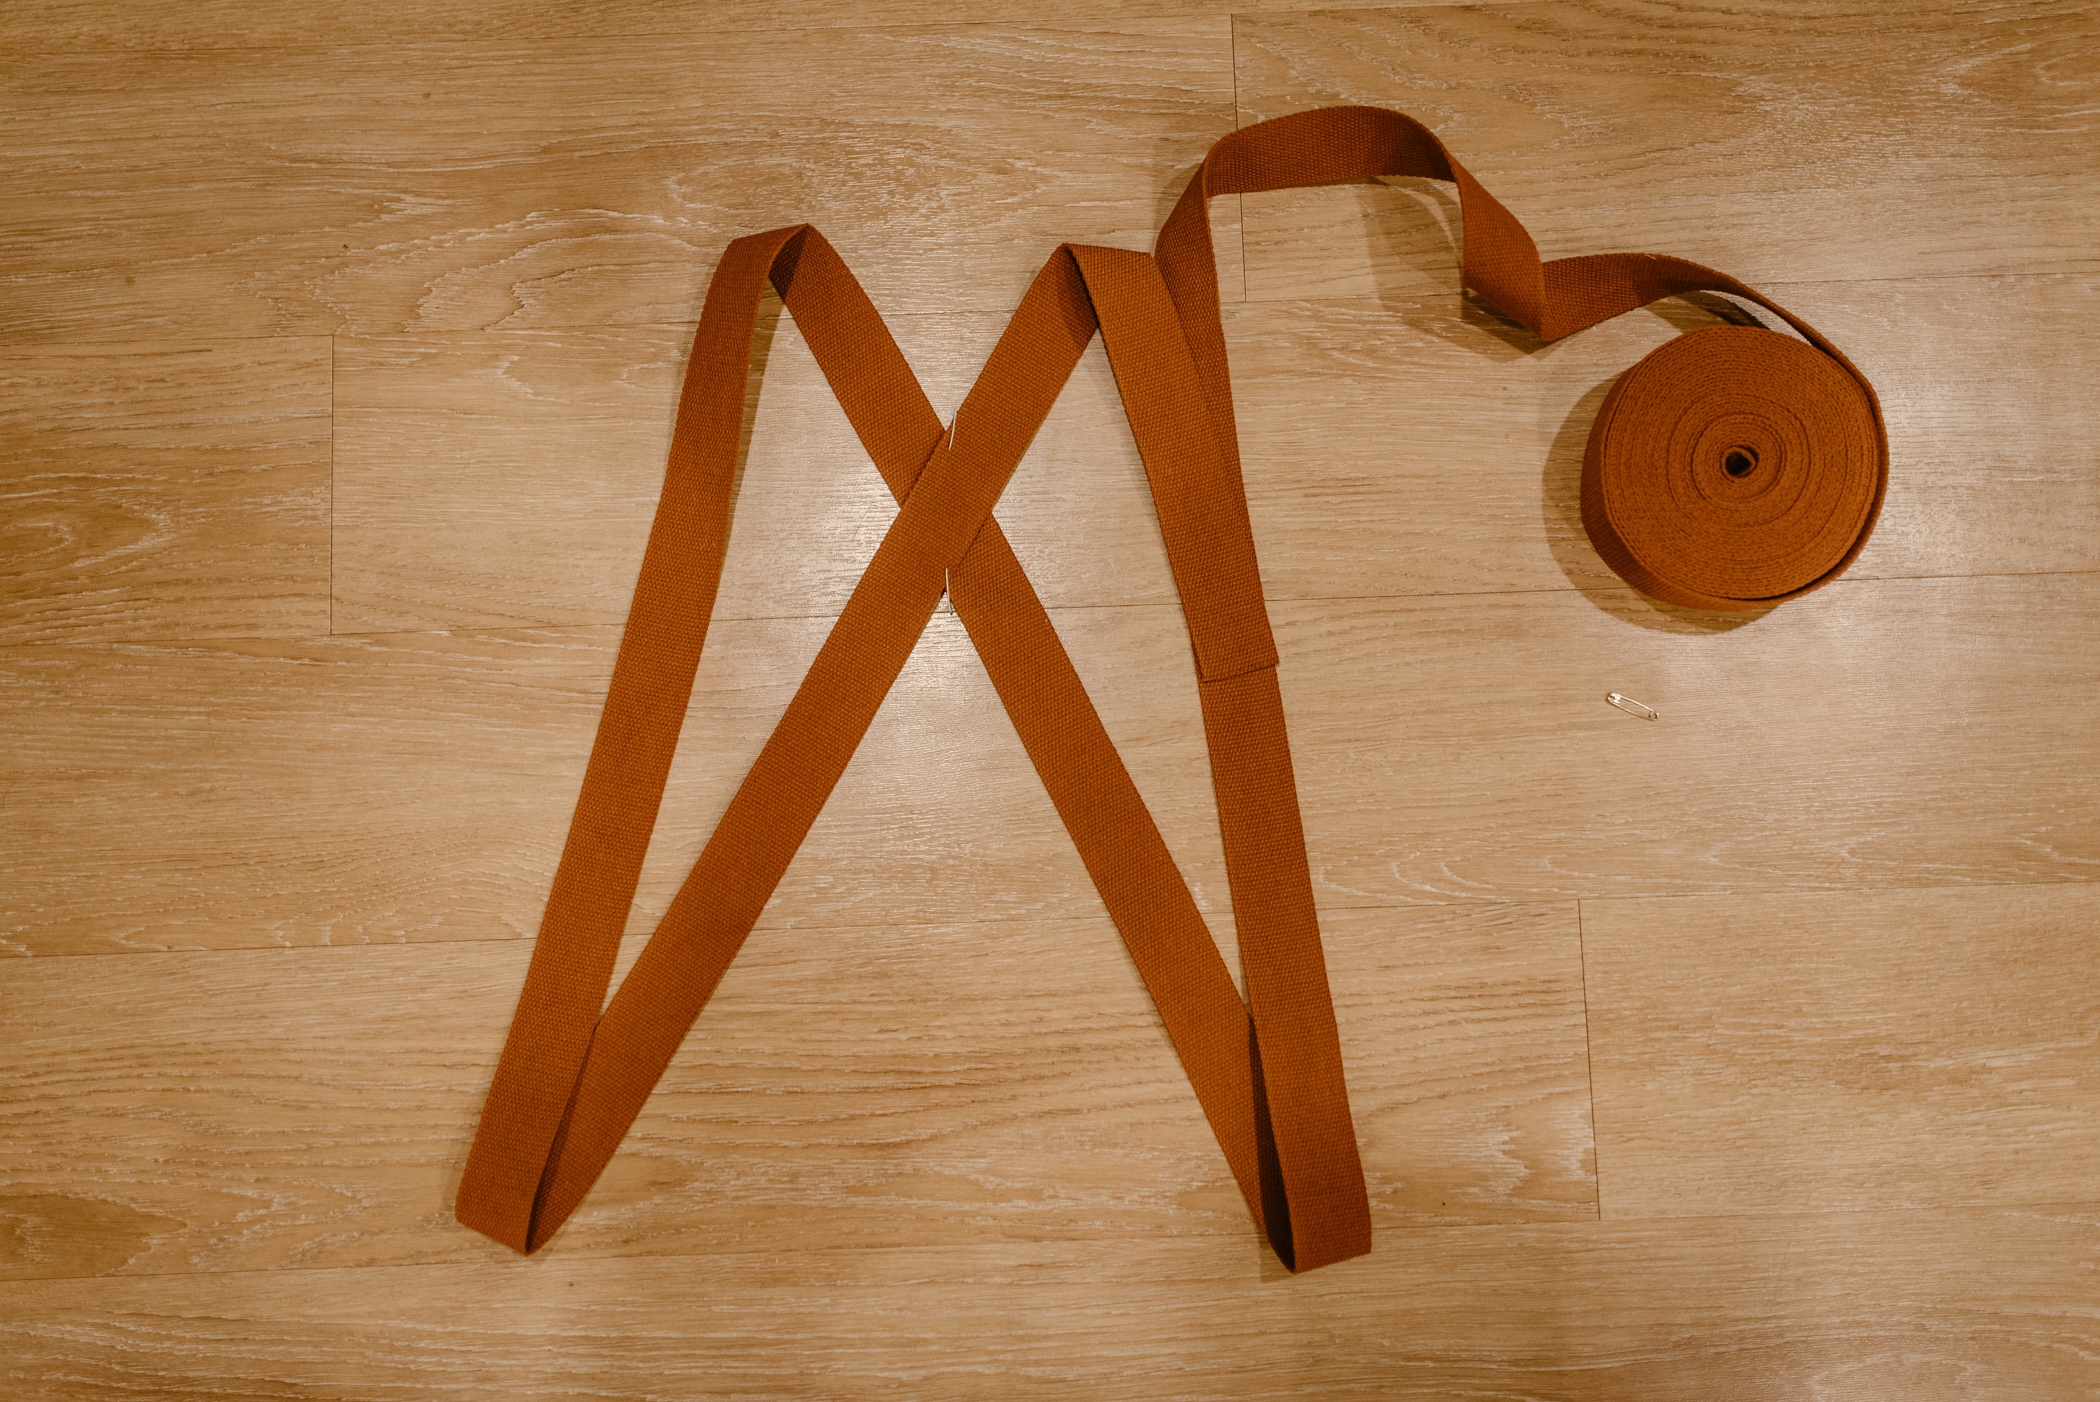
this first step may take a little trial and error, you must arrange the ribbon like the picture below, place pins on the "X" on the back and on the ends of the ribbon and try it on until you like where it sits on you. You are aiming for the bottom of the straps to be sitting around your waist area.
(For reference, my ribbon was aprox. 71.5" in length and I am 5'4 and 122 pounds, this could be a good starting length and adjust from there)
[ The pinned "X" when I tried the straps on ]
[ As you can see the first time I tried this the straps were about 2" below my waist, so I tightened the strap about 4-6" in total and repined the "X" and end of the strap and tried this a few times until it sat around my waist ]
#2
Once your straps are sitting around your waist, its time to make the cut! Cut the ribbon right at the end of the overlapping ribbon (like the below picture)
[ How it should look after the cut ]
#3
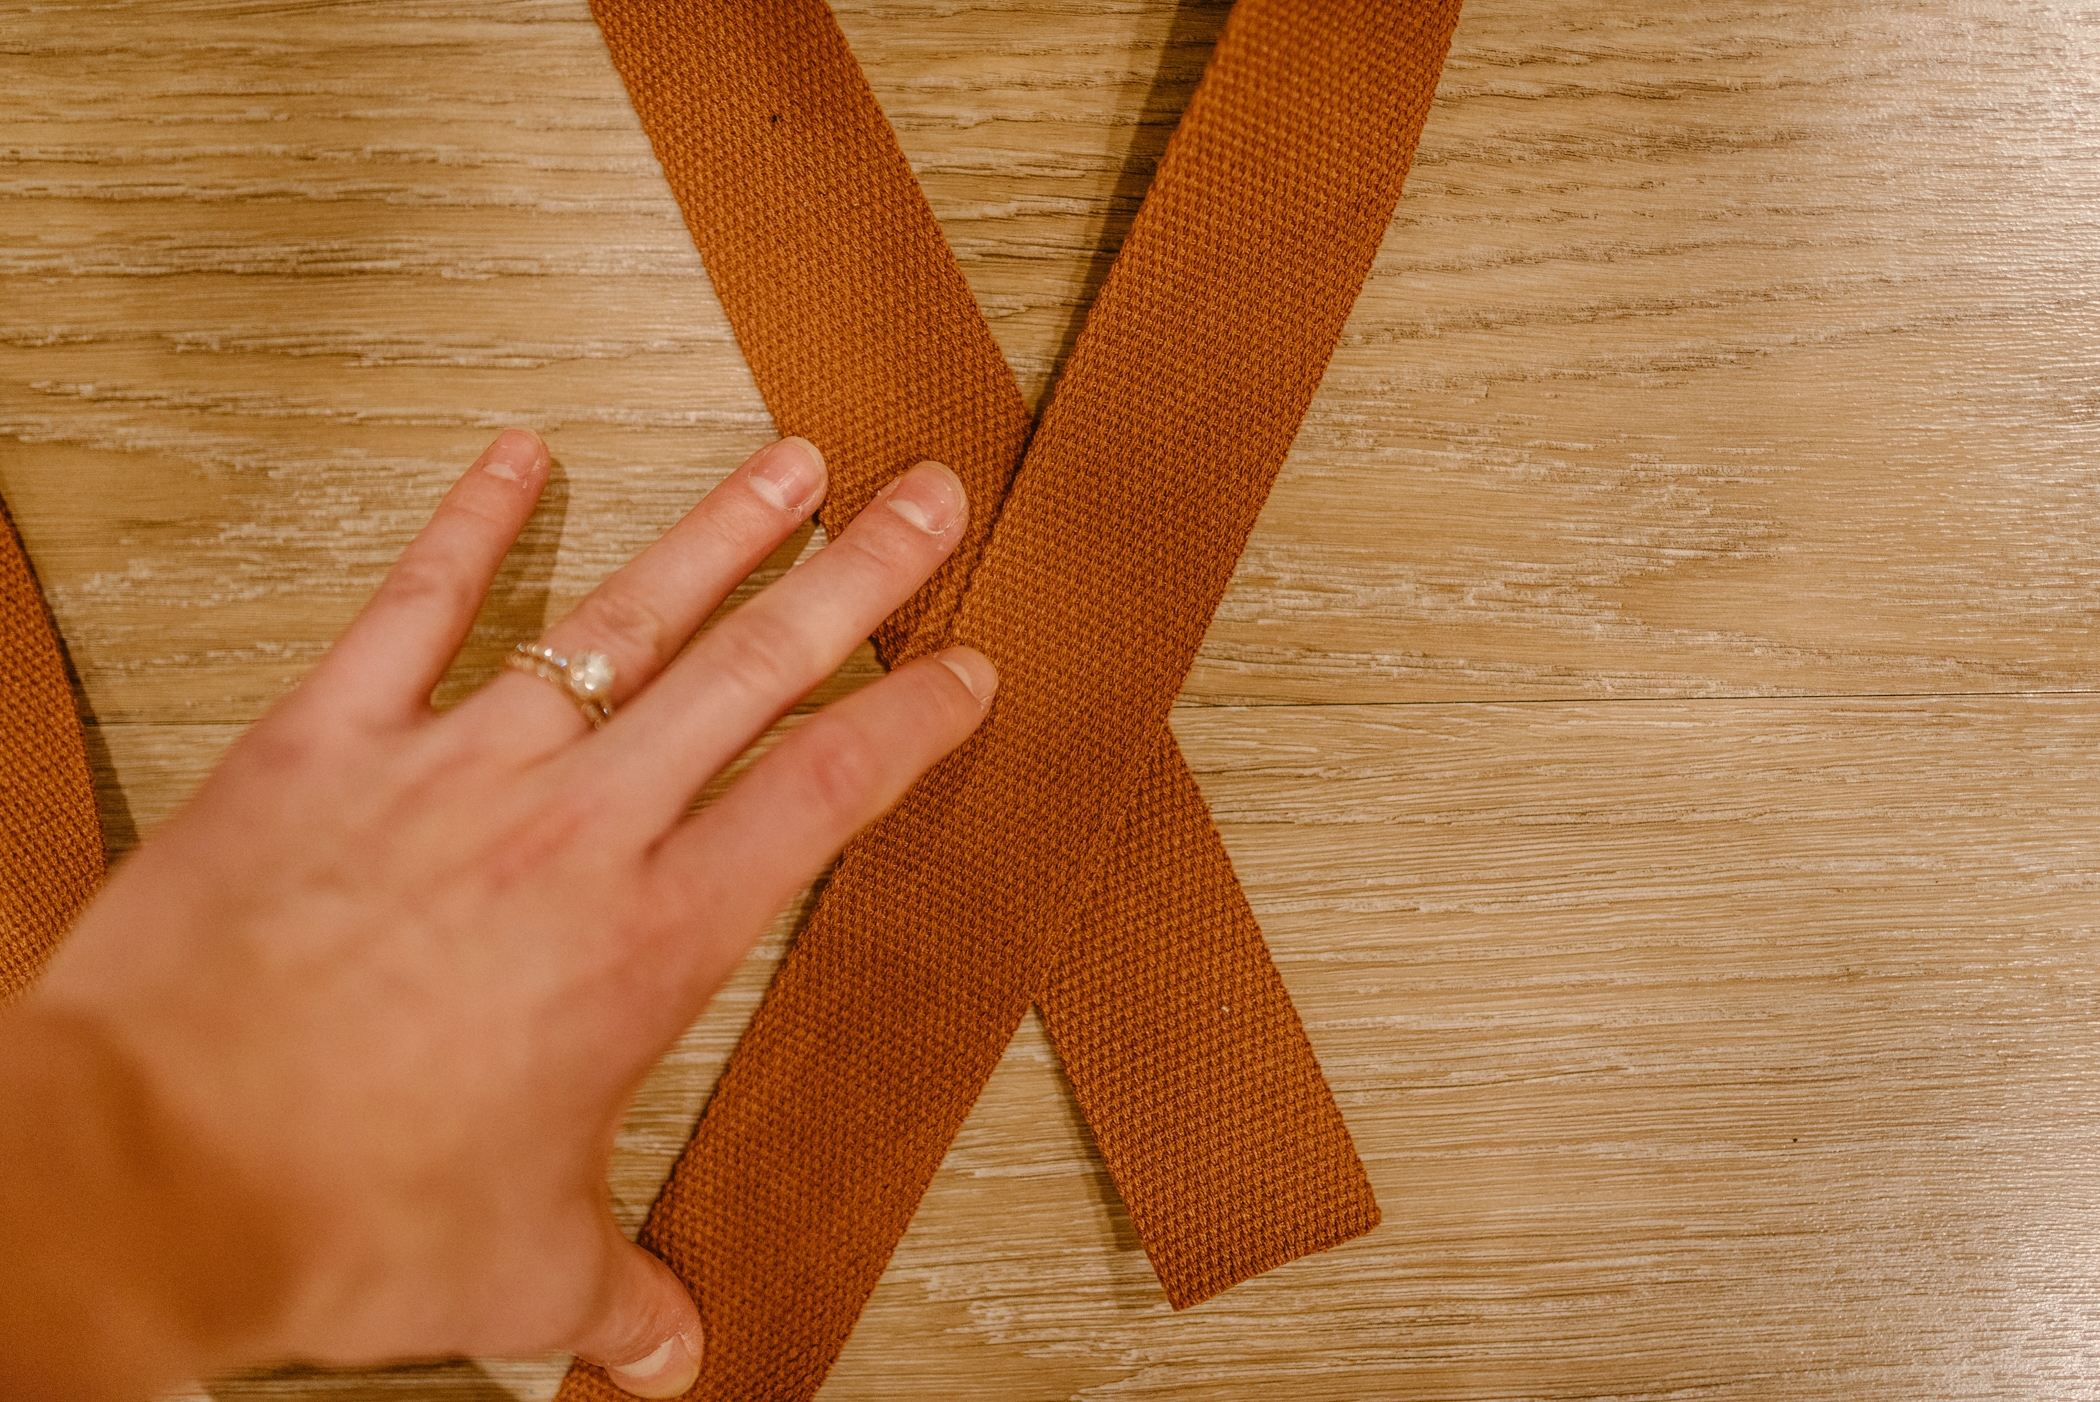
Take off the pins from the "X" and re-locate the ends of the ribbon to be in the centre of the "X" (below pictures for examples, this will ensure that the seam will be hidden when you are wearing it)
[ The way I arranged it I had to move the ribbon from the back to the front ]
[ place the end of the ribbon in the centre of what will be the "X" once the other end is attached ]
[ once you've done the step it should look something like this ]
[ rearrange the straps to get your original shape back, making sure both sides are even ]
[ a tip is to slide the two open ends down the other ribbon to keep the "X" shape until both sides start to look even when flattened down ]
#4
Grab the two ends of the ribbon and slide a triangle D ring onto each side
#5
Bring the two ends to your handy-dandy sewing machine and make a few zigzag stitches to bring them together (you can overlap them and make a straight stitch on top if you like, but I didn't want the added bulk of overlapping a third layer of strapping)
#6
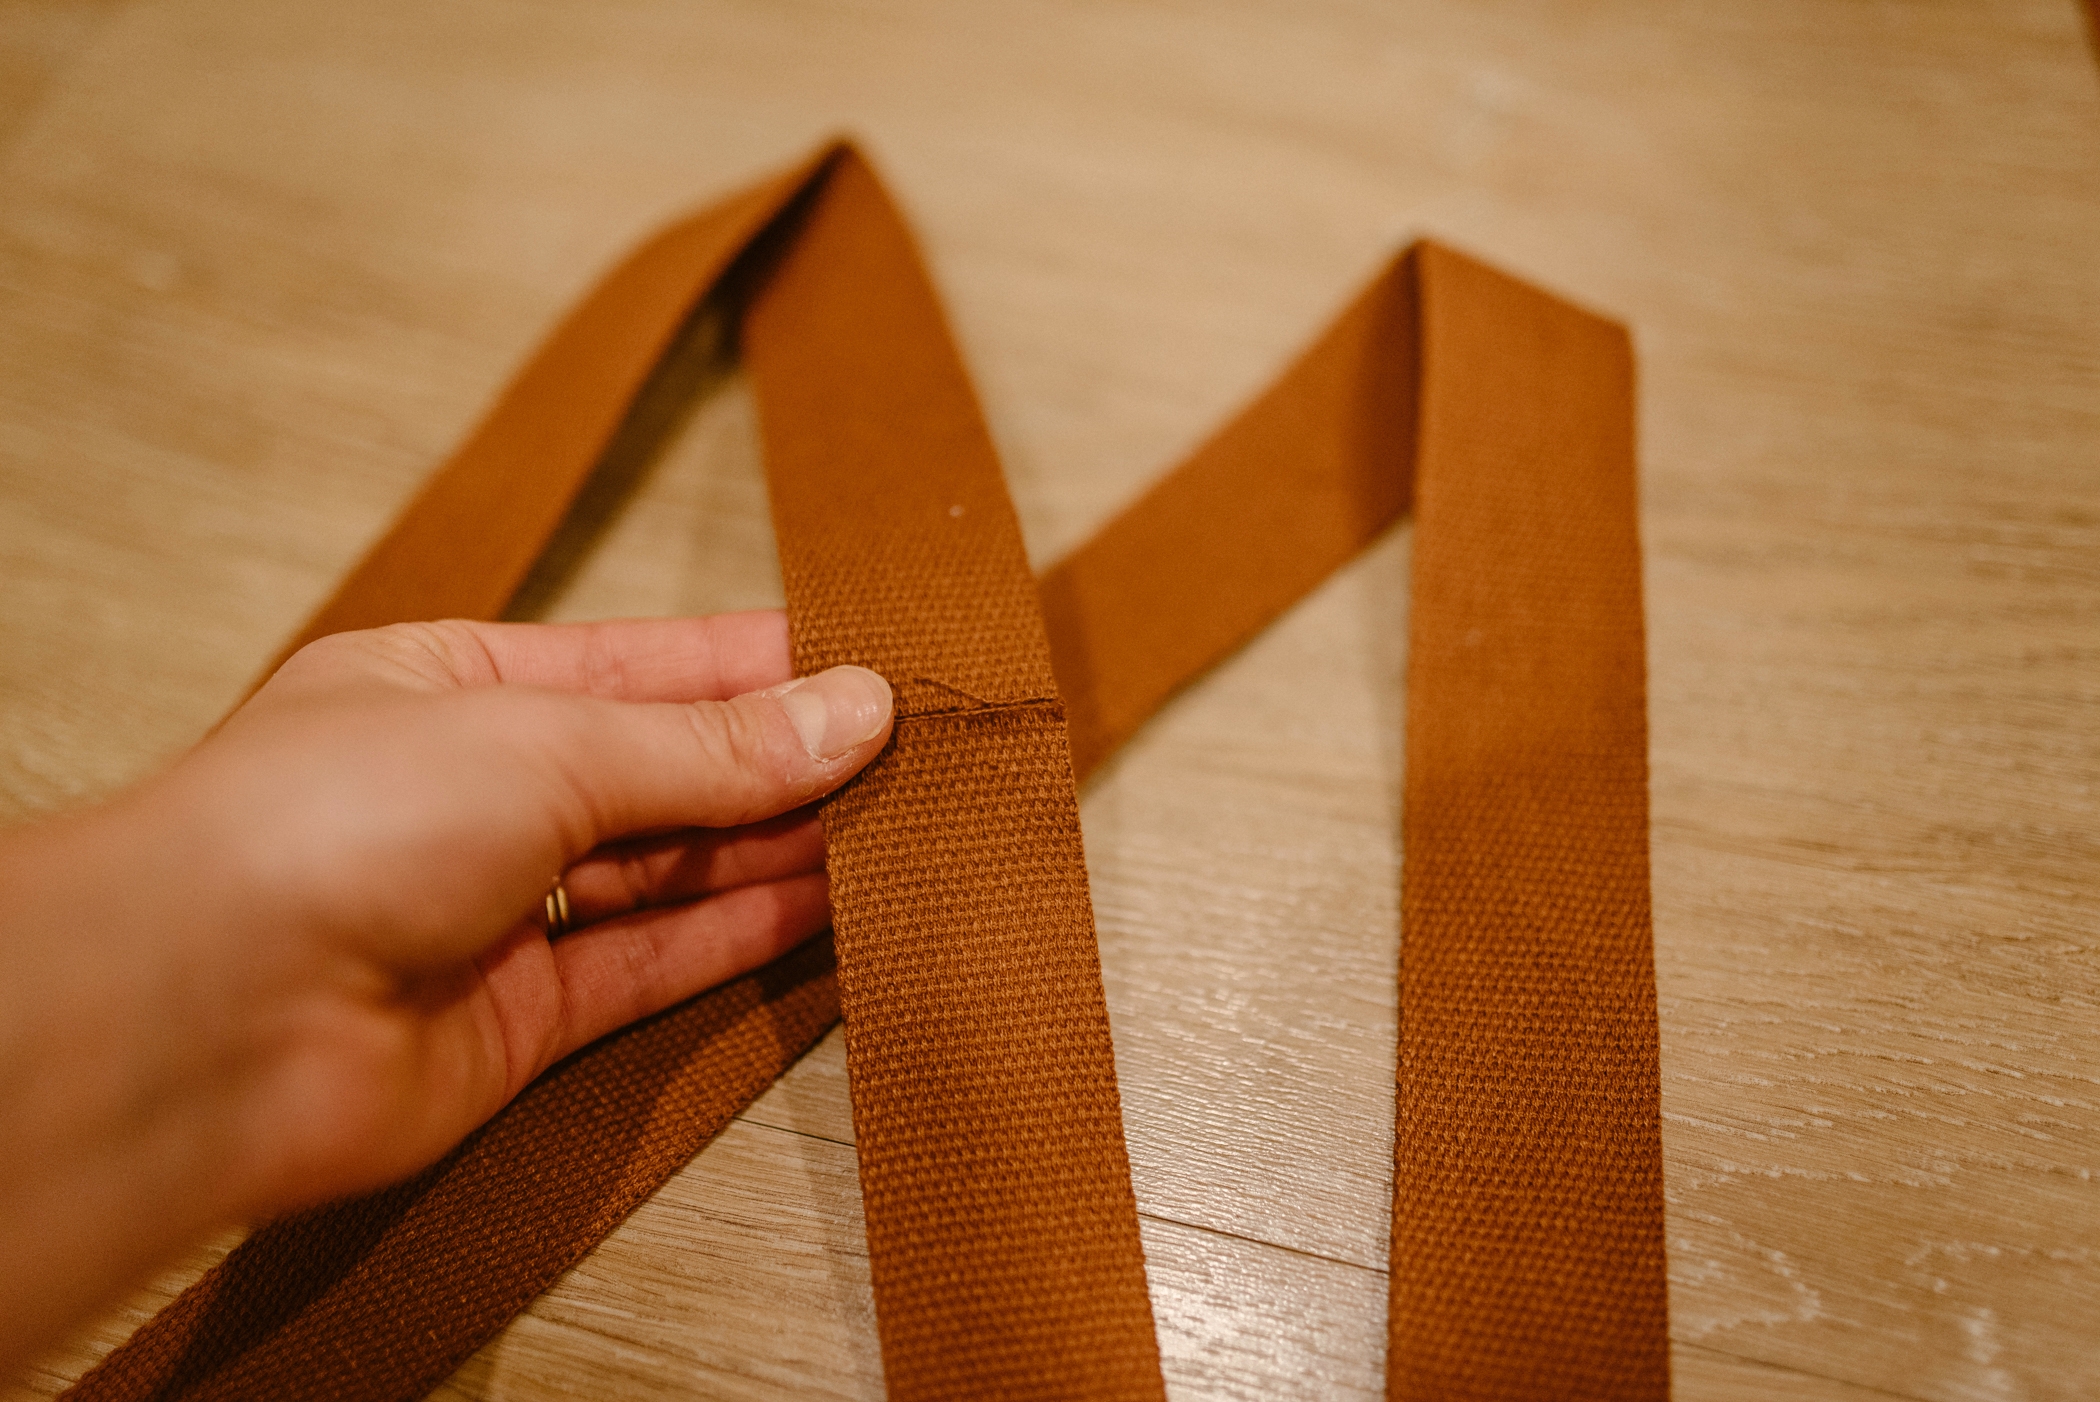
Find a small object you can use to wedge a small hole into the canvas strapping to make room for the rivet stud (the first time I did this I actually used scissors and it didn't tear any of the threads! but to be safe I would use something like a knitting needle or in my case the remains of a pen I had lying around that worked perfectly)
[ insert small object to make room for rivet, this might take a little bit of wiggling around ]
[ insert rivet stud through both layers of strapping ]
[ pop rivet cap on the end of the rivet and make sure you press down hard and it is on there secure, when you try to tug the two straps apart THEY SHOULD STAY TOGETHER, if it falls apart you either didn't press down hard enough or it is a faulty cap, grab another one from the bag and try again ]
[ Woo Hoo! We have our straps! ]
#7
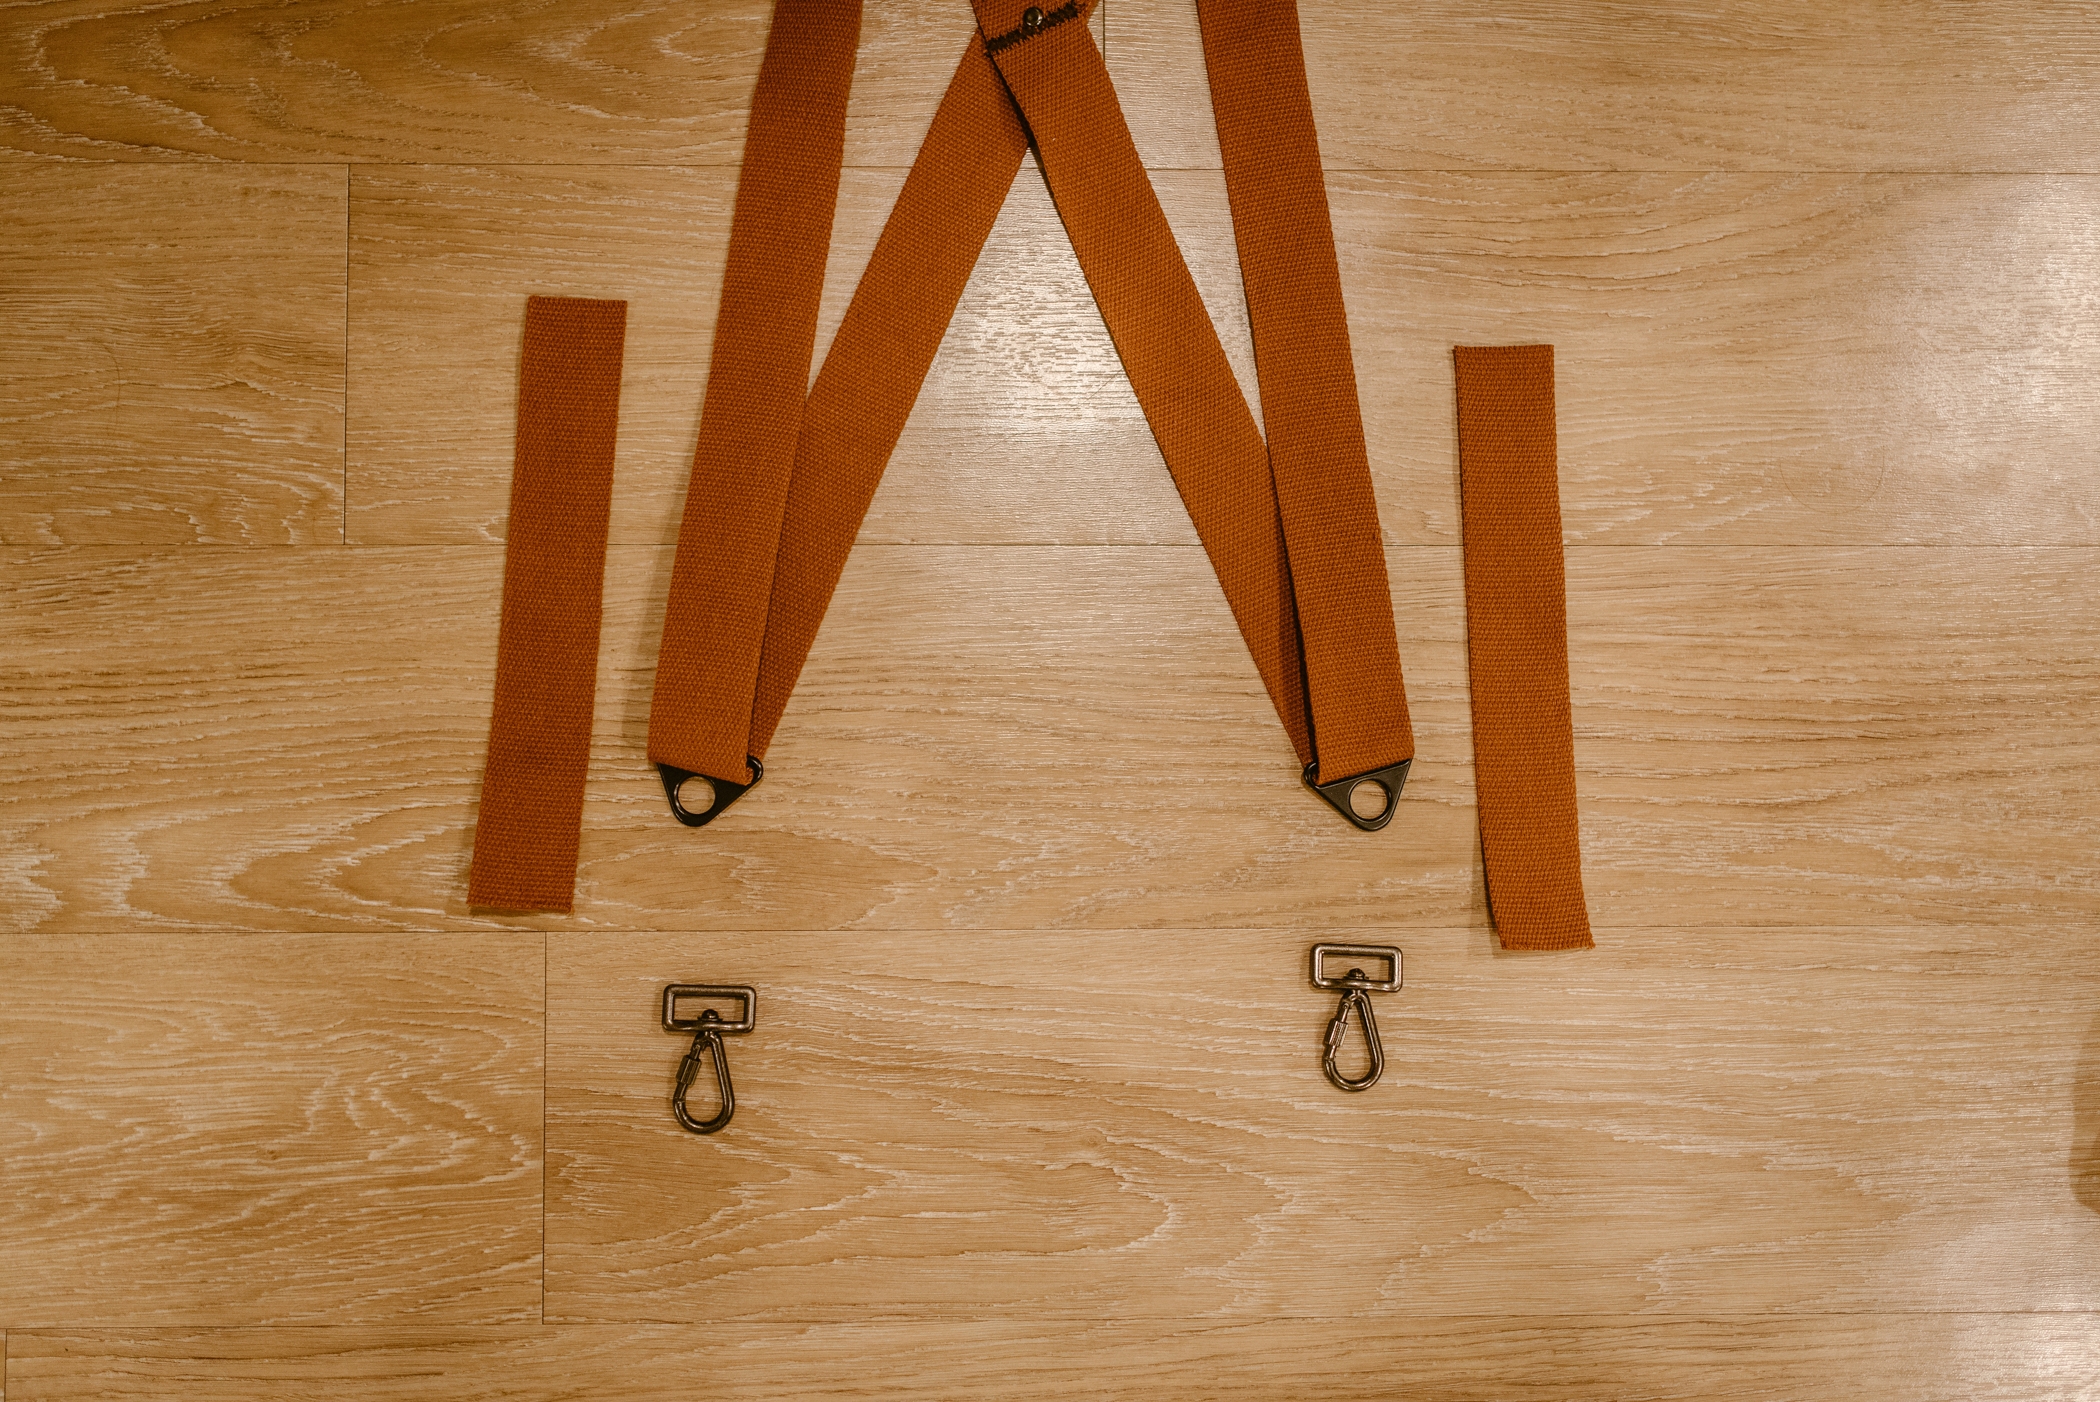
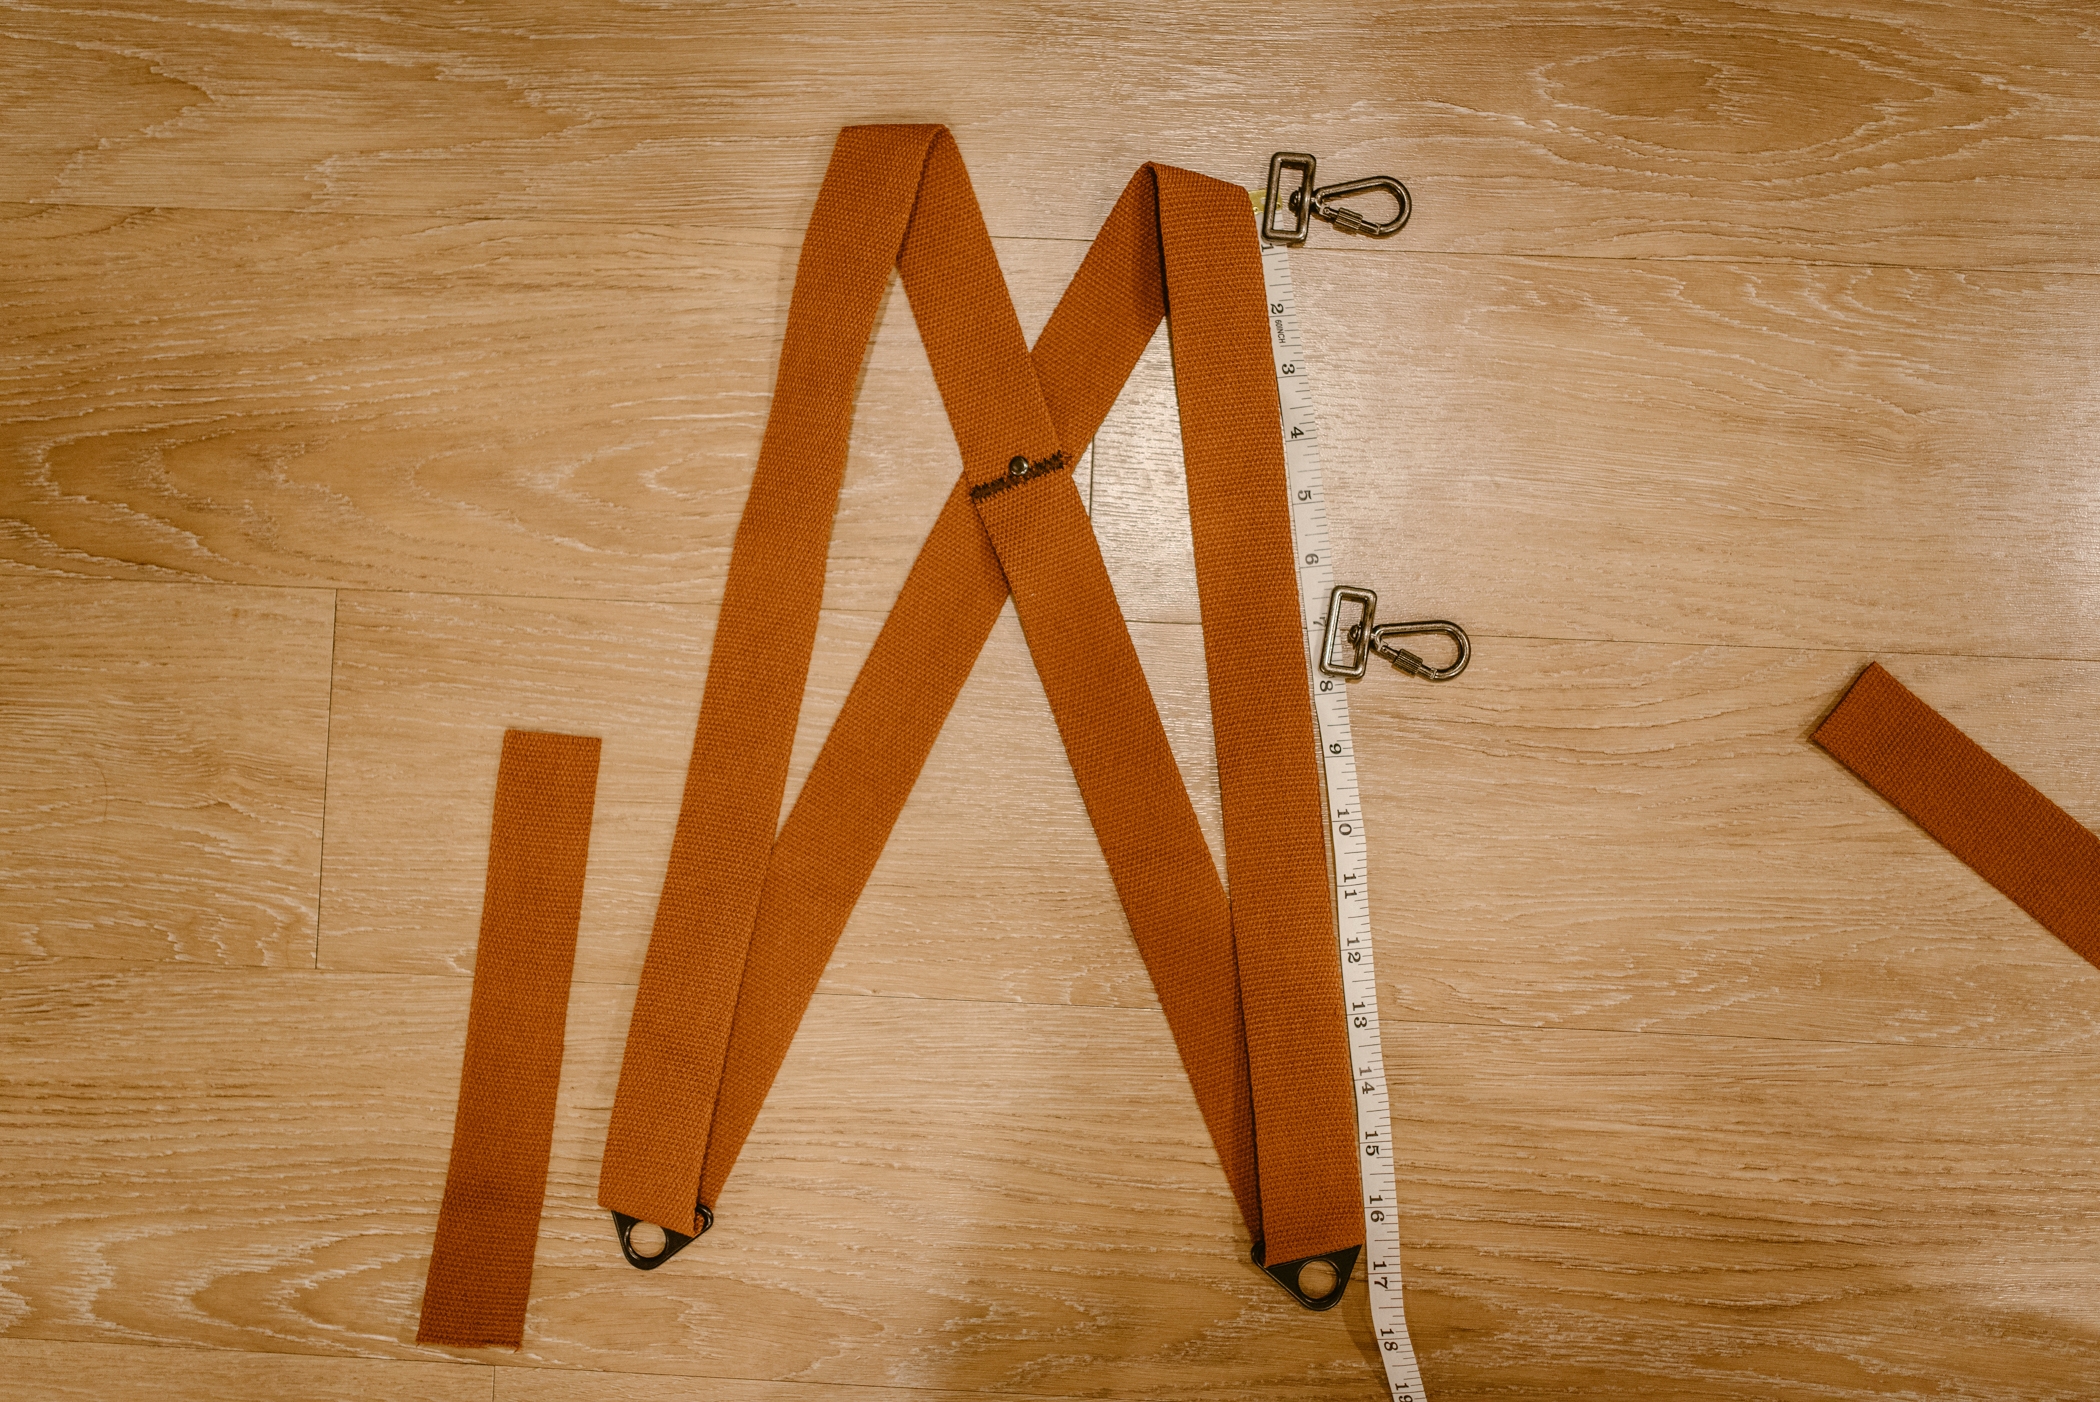
Now its time to cut the straps that hold the carabiners. This is another step that might need a little trial and error or pinning and testing to see how long you should cut yours, again for my height I cut mine at 9.5". After being stitch together this allows the cameras to hang around my hips which is where you want them to hang (or maybe your preference is to have them hang higher or lower, your choice! )
#8
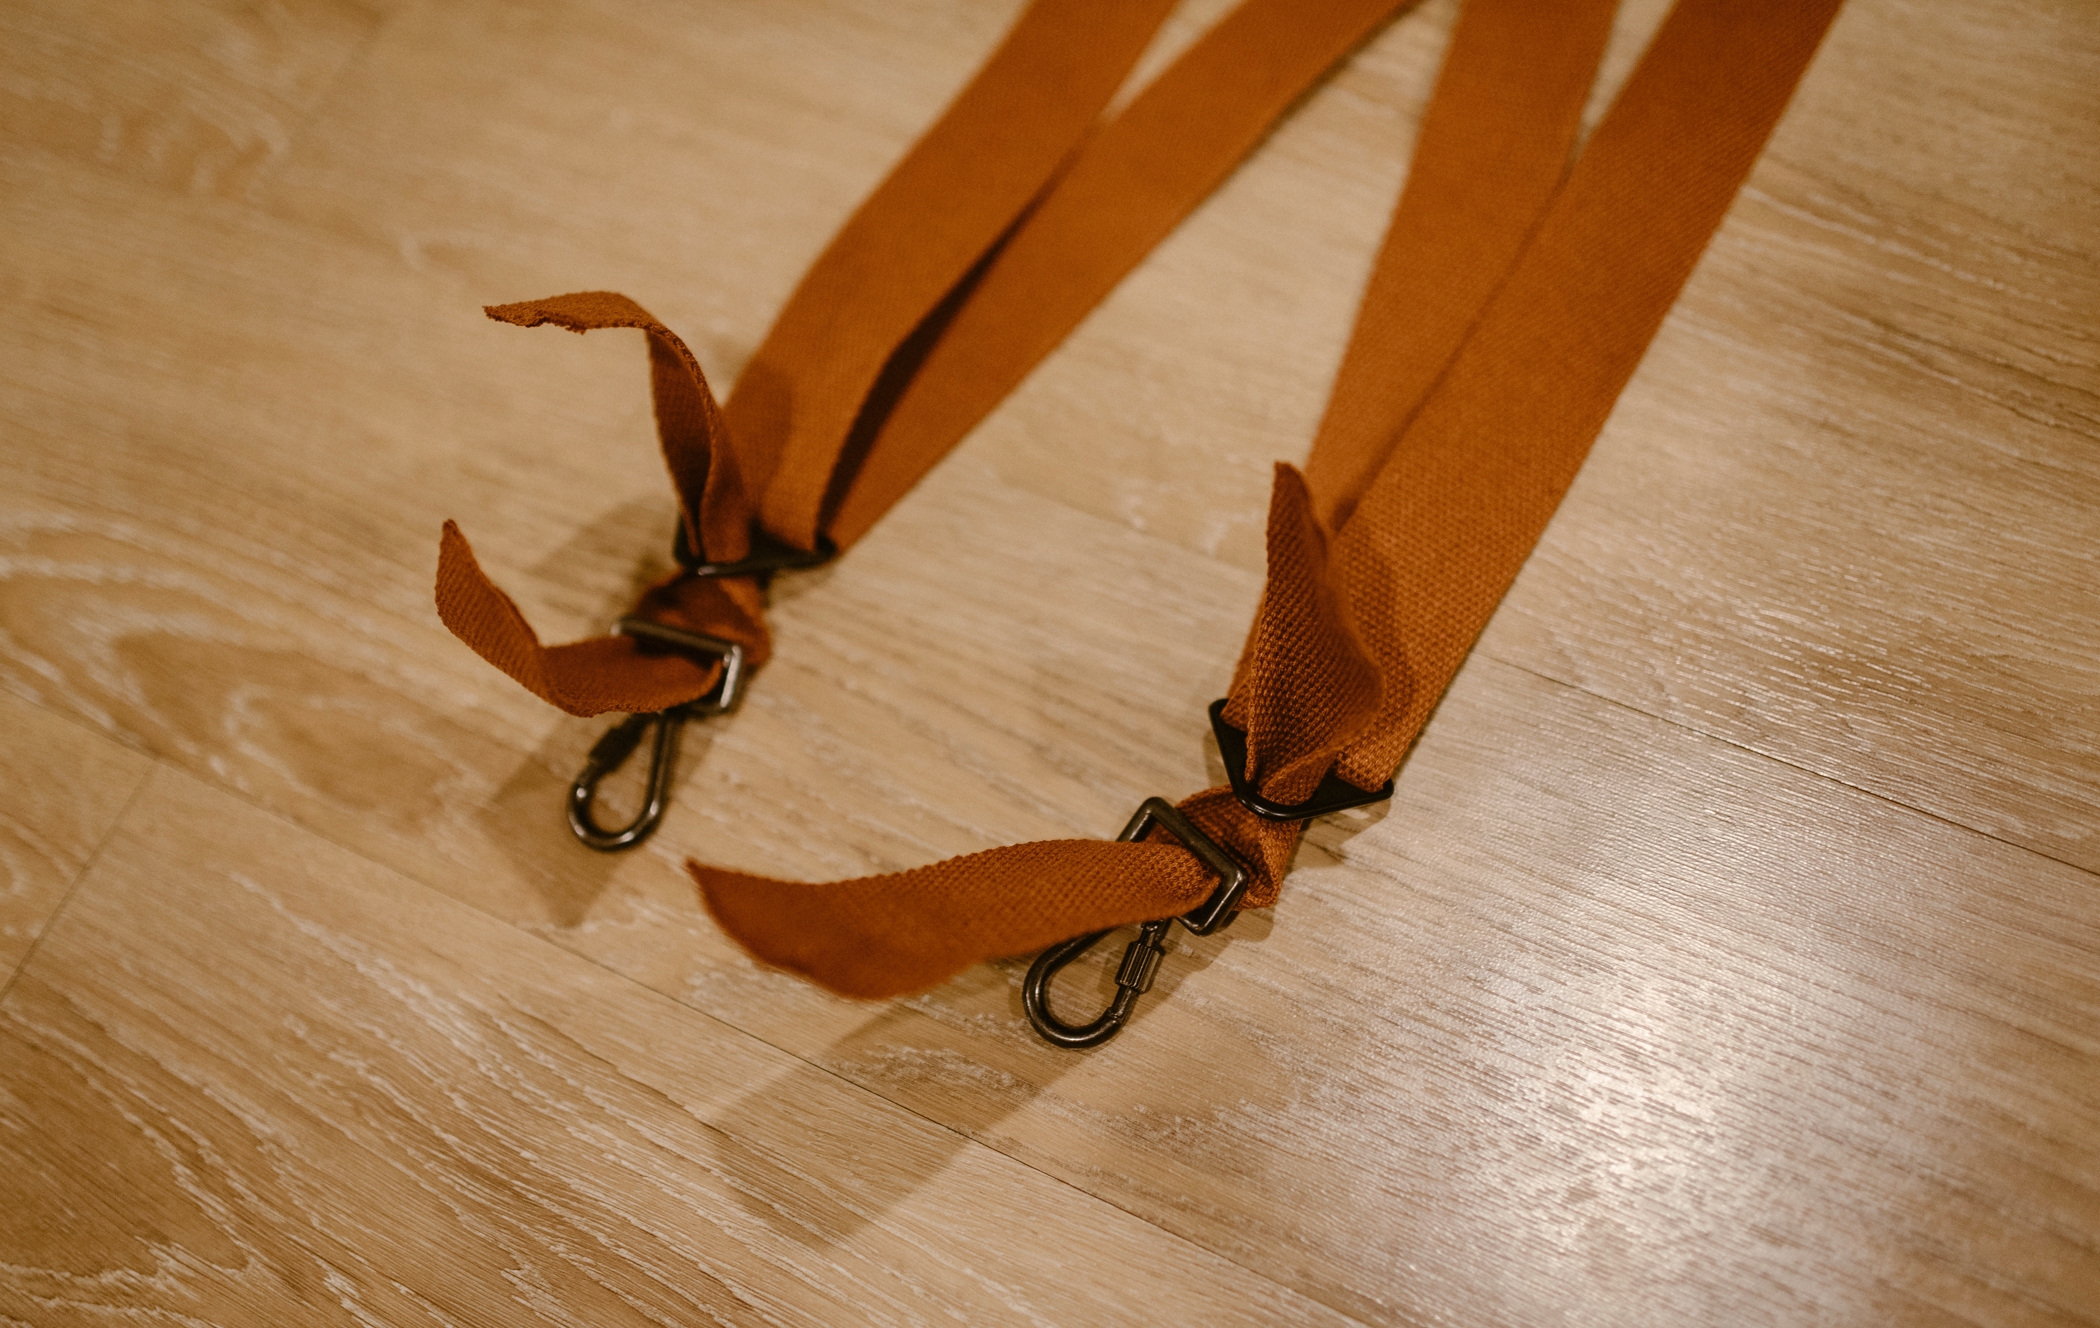
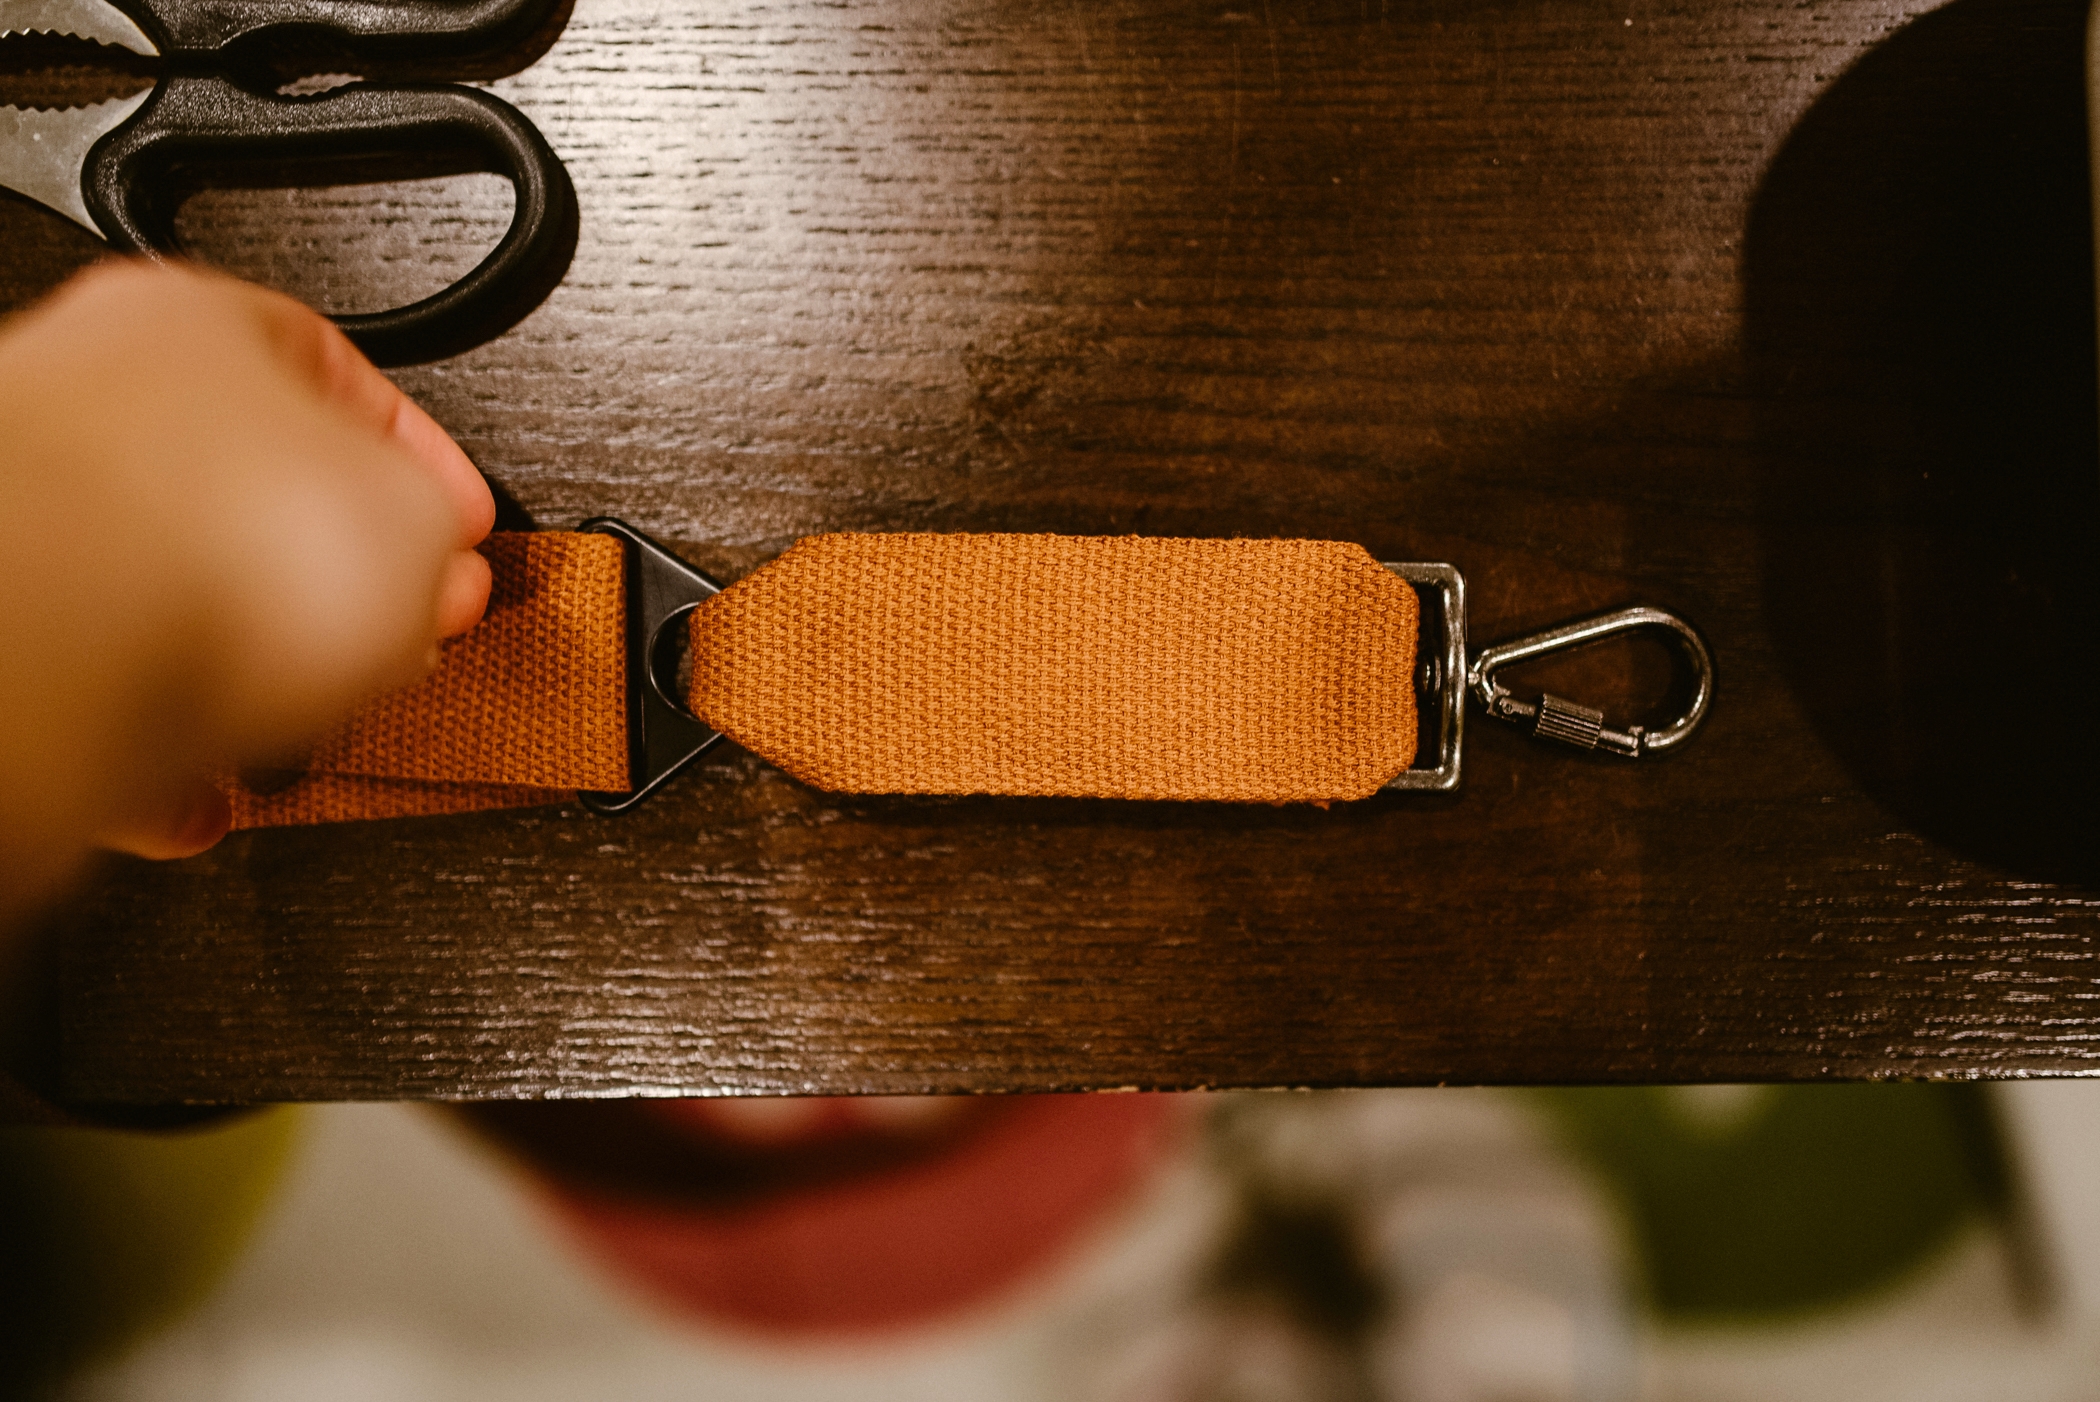
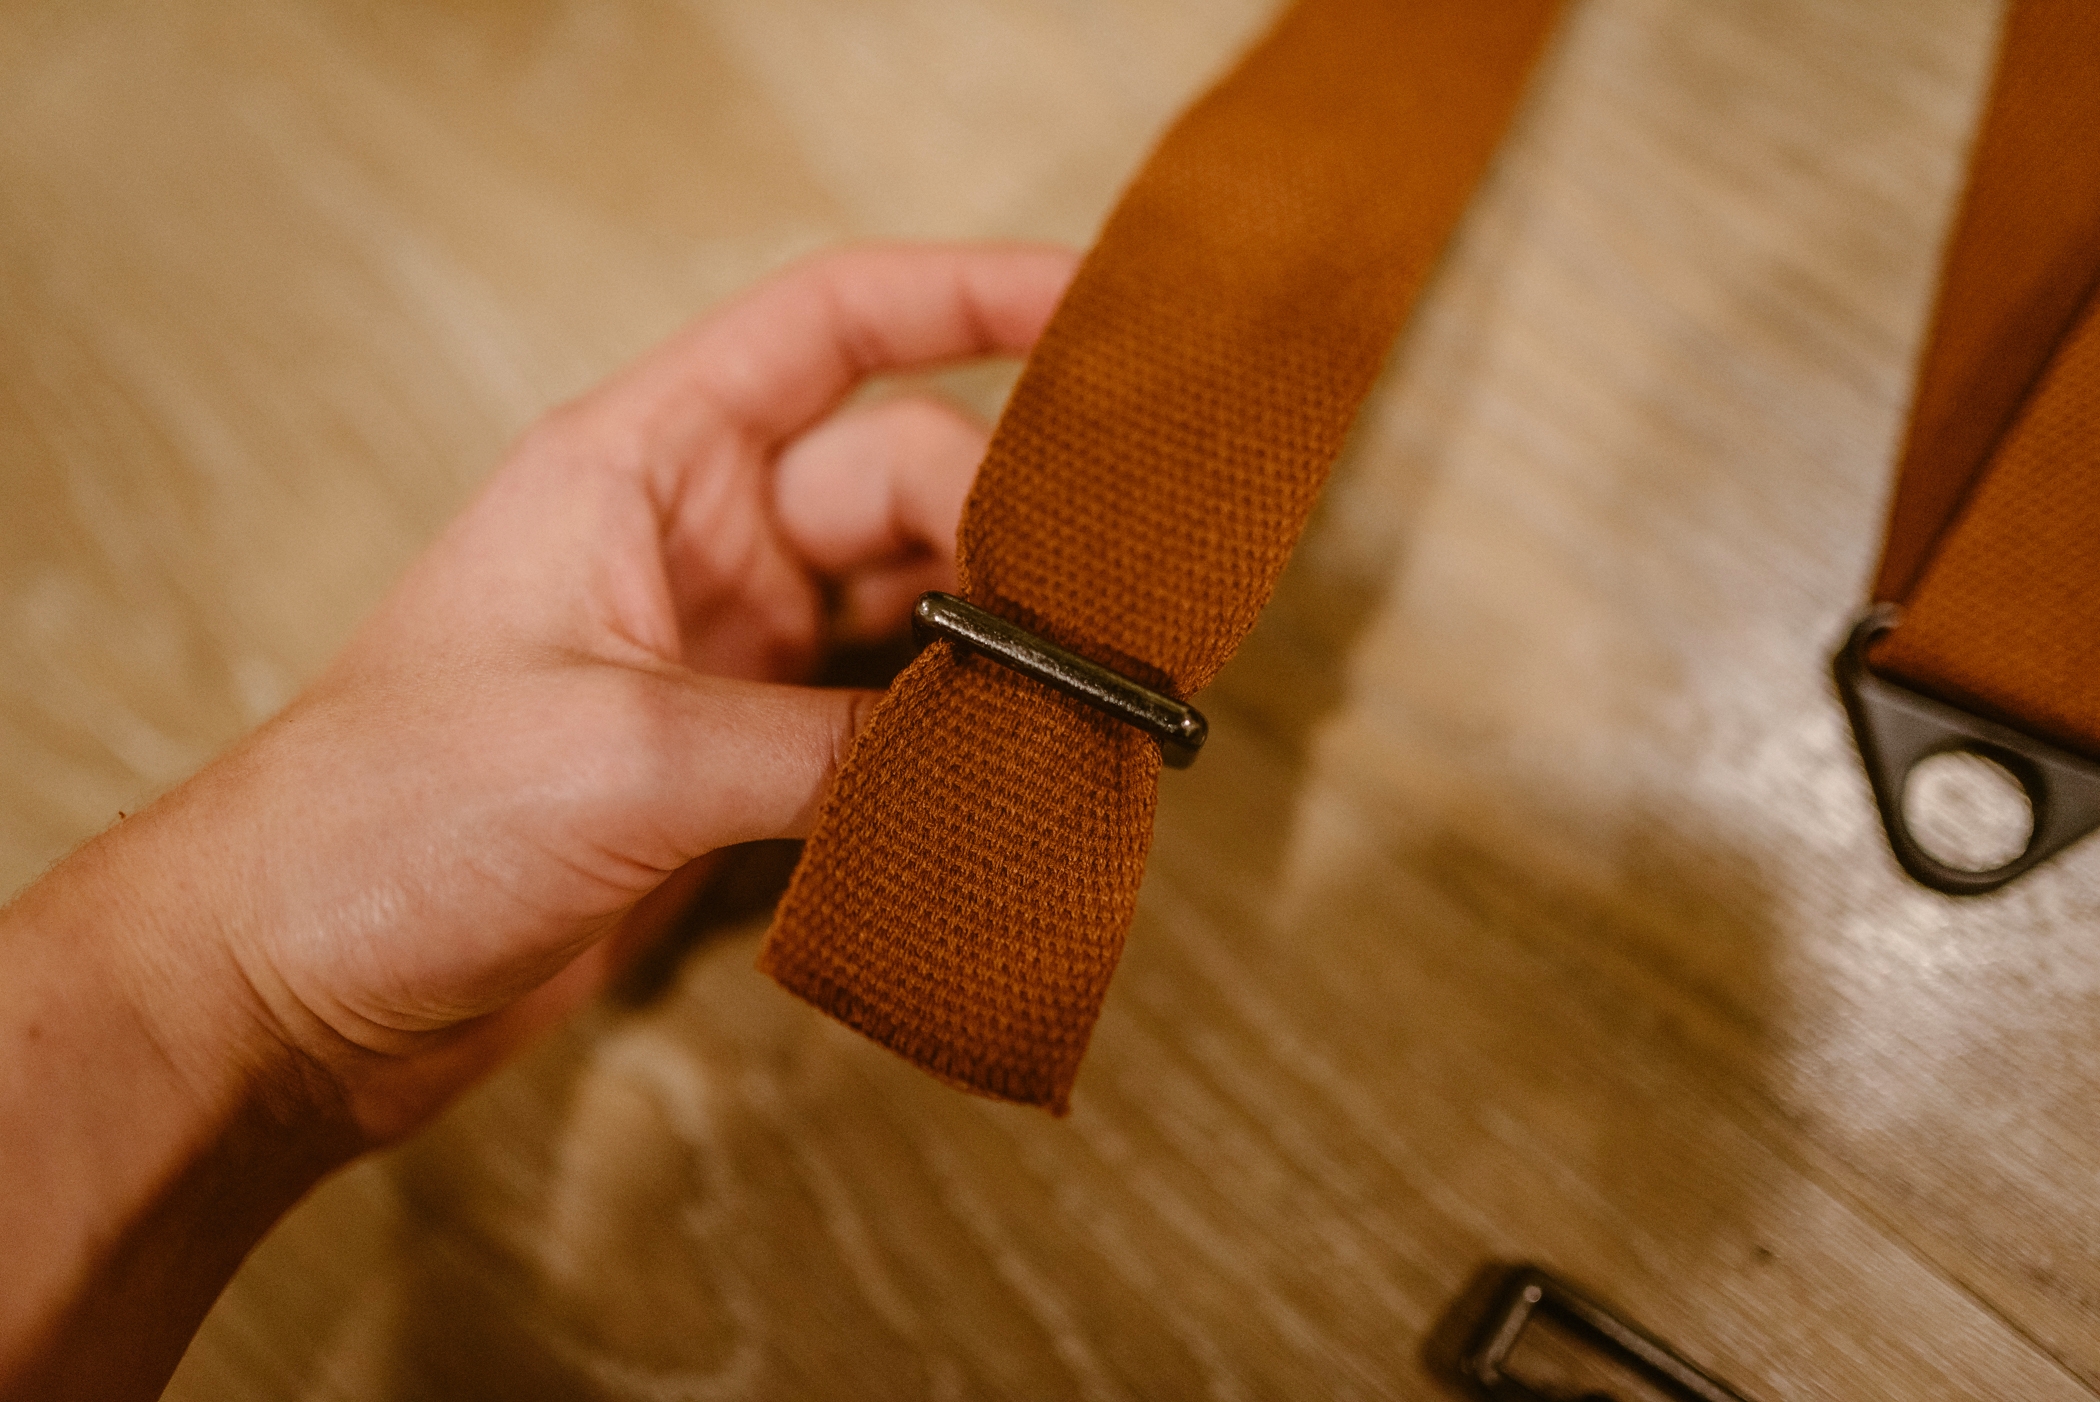
Once Straps are cut, insert into the end of the D ring and through the carabiner, making sure they are folding towards the inside (or towards the centre)
[ make sure the two edges are folding towards the inside or towards each other ]
#9
Grab the two ends and overlap them by about 1/4". and run another few zigzag stitched over them to secure them together (make sure whichever way you over lap one side, make sure you do the same for the other)
#10
Slide the seams to what will be the back of the straps, and place them as close to the bottom of the carabiner as possible (this will keep them the most out of sight) and flatten out like the below picture
#11
Run a line of stitching along the edges of the strap, and stitch two lines through the centre to make an "X" in the middle ( I actually ran two lines of stitching along the edges and through the "X" just for extra security)
#12
Slide the camera screw mounts onto the carabiners and Voila!
You're done!
I chose not to add my D rings at this time, but they can add a nice touch if you decide to do so. Make sure to buy or make some safety straps before using this in the field (screw mounts can come undone!) but until then this is a great way of getting a custom made strap that you can custom make to your own size/preferences! If you have any questions Shoot me an email or leave a message below.
- Moriah




![[ The pinned "X" when I tried the straps on ]](https://images.squarespace-cdn.com/content/v1/57de368bf5e23162d7cfbb70/1511155877622-8YQMCVQDHW3O2NJBHVVF/DIY+Dual+Camera+Strap+Harness+%286+of+55%29.jpg)
![[ As you can see the first time I tried this the straps were about 2" below my waist, so I tightened the strap about 4-6" in total and repined the "X" and end of the strap and tried this a few times until it sat around my waist ]](https://images.squarespace-cdn.com/content/v1/57de368bf5e23162d7cfbb70/1511155925602-NDUUOVP8IPNP4V430J6L/DIY+Dual+Camera+Strap+Harness+%287+of+55%29.jpg)

![[ How it should look after the cut ]](https://images.squarespace-cdn.com/content/v1/57de368bf5e23162d7cfbb70/1511156829874-XAZ322SERLSWE9TY3GE8/DIY+Dual+Camera+Strap+Harness+%2811+of+55%29.jpg)

![[ The way I arranged it I had to move the ribbon from the back to the front ] ](https://images.squarespace-cdn.com/content/v1/57de368bf5e23162d7cfbb70/1511157859292-835X4GGTXB0OHYI0G3Y9/DIY+Dual+Camera+Strap+Harness+%2818+of+55%29.jpg)
![[ place the end of the ribbon in the centre of what will be the "X" once the other end is attached ]](https://images.squarespace-cdn.com/content/v1/57de368bf5e23162d7cfbb70/1511157917773-BBQCK3PFTR3PVJ2G1I4N/DIY+Dual+Camera+Strap+Harness+%2819+of+55%29.jpg)
![[ once you've done the step it should look something like this ]](https://images.squarespace-cdn.com/content/v1/57de368bf5e23162d7cfbb70/1511158015767-6LU27STO0A5K6CA9L73U/DIY+Dual+Camera+Strap+Harness+%2820+of+55%29.jpg)
![[ rearrange the straps to get your original shape back, making sure both sides are even ] ](https://images.squarespace-cdn.com/content/v1/57de368bf5e23162d7cfbb70/1511158115578-FDPTAG1GPNDET6DFBQAA/DIY+Dual+Camera+Strap+Harness+%2821+of+55%29.jpg)
![[ a tip is to slide the two open ends down the other ribbon to keep the "X" shape until both sides start to look even when flattened down ] ](https://images.squarespace-cdn.com/content/v1/57de368bf5e23162d7cfbb70/1511158171038-Q98T22C5JLWGC3LB5DU4/DIY+Dual+Camera+Strap+Harness+%2822+of+55%29.jpg)




![[ insert small object to make room for rivet, this might take a little bit of wiggling around ] ](https://images.squarespace-cdn.com/content/v1/57de368bf5e23162d7cfbb70/1511159691130-9TW55HNAGNZ6VRGEXUXP/DIY+Dual+Camera+Strap+Harness+%2834+of+55%29.jpg)
![[ insert rivet stud through both layers of strapping ] ](https://images.squarespace-cdn.com/content/v1/57de368bf5e23162d7cfbb70/1511159736577-4ZAU1WNK3WF1GQ61RJF6/DIY+Dual+Camera+Strap+Harness+%2835+of+55%29.jpg)


![[ Woo Hoo! We have our straps! ] ](https://images.squarespace-cdn.com/content/v1/57de368bf5e23162d7cfbb70/1511160023429-TLTENPHWWOI5KUUQ7U2E/DIY+Dual+Camera+Strap+Harness+%2838+of+55%29.jpg)

![[ make sure the two edges are folding towards the inside or towards each other ] ](https://images.squarespace-cdn.com/content/v1/57de368bf5e23162d7cfbb70/1511160635115-QSIHAQ2ZRIPP48F919A7/DIY+Dual+Camera+Strap+Harness+%2843+of+55%29.jpg)
